Our social media accounts are full of people making and wearing tie dye. Even our favorite YouTubers are getting their gloves out to mix all the colors and hopefully end up with a cute looking shirt and, in some cases, even an outfit. I could not understand the hype for poorly colored clothes until I decided to try it myself. With our vacation date fast approaching and my never-ending quest to find matching outfits, I decided to make tie dye shirts for the whole family. This way I could ensure we were all wearing similar outfits. I thought it would be fun but didn’t really get my hopes up. That was, until, I started to get the color into the shirts. I can officially say that I loved tie dying and I am looking forward to creating more designs.
Here are the step by step directions on how to get great tie dye and all the techniques we used. Get ready for lots of pictures of this fun experience.
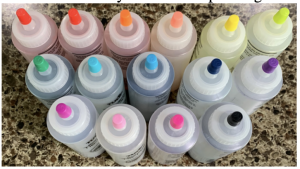
First, I bought the tie dye set. With everyone obsessed with tie dye I had a hard time finding a set that was in stock and available for 2-day shipping thru amazon. I ended up buying this one for $14.00. which is a very good price.
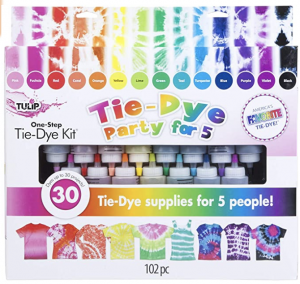
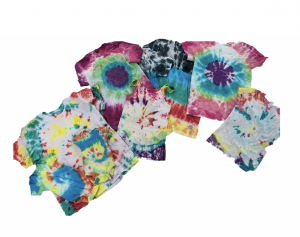
The box indicated that it could dye up to 30 projects, which I don’t necessarily think is true, unless you are referring to small items. I was able to complete 9 pieces and I had left over dye that may be enough for about 5 more projects.
Of all the features mentioned on the box I really loved the following:
-It had enough for all my projects (although not 30)
-It was very simple to make it (just add water)
-The colors were very vibrant
-It comes with all the materials you will need
-The rubber bands did not break at all (which tends to be a problem with a lot of the kits)
-The dye can be used up to 72 hours (which is not the case with all the sets)
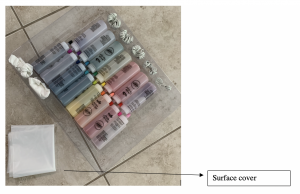
In addition to the rubber bands, gloves, surface cover, and the mixture, I used a bucket with water so I could rinse my hands and not transfer the color from one section into another. I also used some paper towels to clean up the area as I finished with each piece. I was very careful not to get specks of color that were not on the desired design (I wasn’t able to avoid it 100%). You will also need cling wrap for each piece.
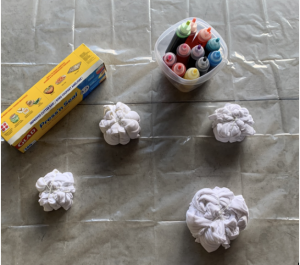
Step one:
-Get all the materials out of the box and make sure you have everything you need. Read the directions carefully and choose your designs.
Step two:
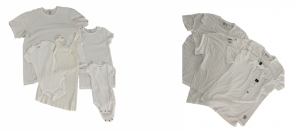
-Get all your white pieces (canvas). Make sure they have been washed before you tie dye them. We ended up having to wash some (since my mom wanted shirts for her and my brother as well) that were new and with those decided to use the wet technique.
- You can buy white shirts anywhere. However, Joann and Michaels have the best price, to my knowledge.
https://www.joann.com/gildan-adult-t-shirt-medium/zprd_14805071a.html#q=white%2Bshirts&start=1
https://www.michaels.com/gildan-short-sleeve-adult-tshirt/10532465.html
Step three:
-Use the design guide sheet to recreate your design. You will have plenty of rubber bands to secure everything in place.
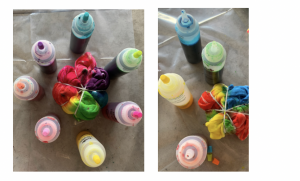
Step four:
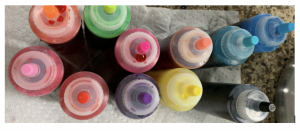
-Make sure you think about your colors ahead of time. That way, you won’t mix all of the bottles if it’s not necessary. We ended up saving 2 bottles of colors that were not used.
Step five:
-Mix your colors. Add water to the designated line and shake.
Step six:
-Cover the surface you will be using for the project.
Step seven:
-Grab your first piece and start adding colors. There is no direction for how to do so… just go CRAZY.
Step eight:
-Once you are done with a piece, wrap it in cling wrap and place it to the side. Then move on to the next one.
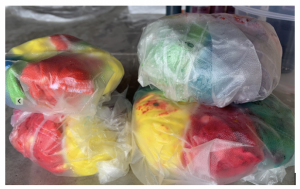
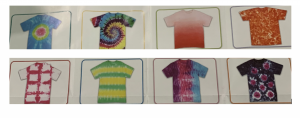
You need to leave them wrapped for 24 hours for better and more vibrant colors.
For the wet technique, wash the items in the washer and, without drying them, follow the same steps.
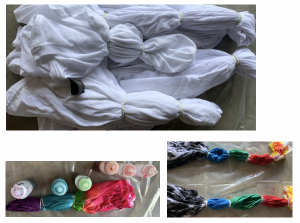
After 24 hours have passed (more or less), unwrap your items one at a time and rinse them thoroughly until no dye comes out.
Once you have rinsed all the pieces wash them with cold water and detergent. You can dry them afterwards.
Some additional tips:
-The wet technique gave the items a more vivid color
-The material of the shirts will determine how well they take in the dye. For example, a shirt that was 100% cotton looked different than one that had 25% polyester.